Dispenser gallons are integral to the businesses of many propane marketers throughout the course of a year. Whether for filling cylinders during the busy summer grilling season, or a dedicated unit supplying autogas for school buses the rest of the year, these gallons are crucial to cash flow. It’s necessary, then, that any dispenser is well taken care of. As is the case with all propane equipment, proper installation and maintenance of your dispenser will prolong its useful life, ensure safe operation, and provide optimal performance.
Installation Instructions
To assist in this venture, we’ve provided helpful installation instructions to get your new dispenser up and running onsite:
- Use a new ASME storage tank if possible. After assembly, purge the container with propane vapor according to the tank manufacturer’s instructions. Be sure to add methanol as needed.
- Use pipe, or square channel, to connect the tank to the dispenser cabinet and support stands (approximately 15’ length for a 500 gallon tank, 21’ length for a 1,000 gallon tank).
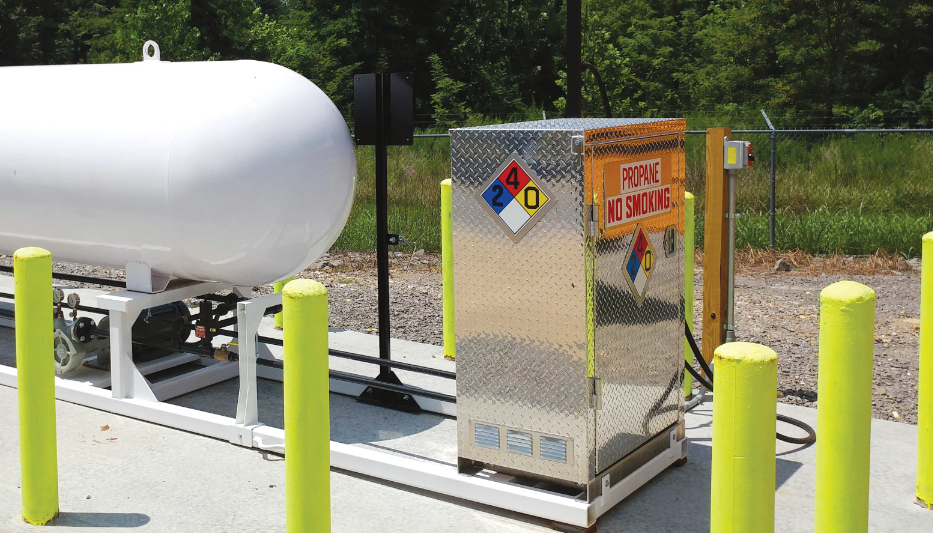
- The dispenser cabinet ties into pipe skid rails. Locking bolts secure components into position.
- Install an internal valve into the 1-1/4” opening in the bottom of the depressurized ASME tank with a quality thread sealant. Orient the closing latch to the direction of “pull” for an emergency shutoff valve (ESV) cable.
- Use 1-1/4” schedule 80 pipe for a liquid withdrawal line.
- Install a 1-1/4” ball valve and ‘Y’ strainer on the liquid line downstream of the internal valve.
- Install a 1-1/4” stainless steel flex line and a 1-1/4” union on the liquid line upstream of the pump. Install a 12” nipple into the pump inlet to reduce liquid turbulence at entry.
- Use a galvanized cable kit, including a pull ring, eyebolt and sign, for the remote shutdown system. Connect a cable to the remote release latch, with thermal protection, on the internal valve. (An air actuator kit is optional.)
- Reference a wire sizing chart for correct wire sizing, as undersized wiring is a very common problem.
- Have a qualified electrician install electrical supply conduit to the pump switch junction box. Confirm pump is running in correct rotation direction. (See directional arrow on pump casting). If pump is running backward, reverse electrical connections to correct.
- Install a liquid bypass return line to the 1-1/4” acme vapor connection at the tank with 3/4” schedule 80 pipe or 5/8” OD type K copper. It’s good practice to install a shut-off valve with hydrostatic relief on the liquid bypass return line. Set the bypass valve according to the manufacturer’s instructions.
- Connect a meter vapor eliminator return line to the POL service valve at the tank using a male POL x 3/8” flare connector. Avoid dips in tubing to prevent liquid propane accumulation. The meter will not operate properly if the return line is blocked with liquid.
- Pressurize the system slowly with propane vapor during initial startup.
- Check local codes to see if vehicle crash posts and/or fencing are required.
- Provide emergency contact phone numbers and a 20 lb. BC fire extinguisher.
Maintenance Schedule
Maintaining your dispenser isn’t as difficult as you may think. Organizing a dispenser maintenance schedule into daily, weekly, monthly, quarterly timeframes, etc., keeps it all top of mind and simple. Here are our recommendations for an easy-to-follow onsite dispenser maintenance schedule:
During each fill:
- Visually inspect tank and tank valves.
Daily:
- Visually inspect fill hoses and fill valves for signs of wear;
- Operate internal valve and/or emergency shutoff valve (ESV) for correct closure.
Weekly:
- Visually inspect hoses, valves and piping;
- Run pump motor for an hour on a dry day to vaporize water accumulation.
Monthly:
- Check pipe joints and other connections for leaks;
- Operate globe and ball shutoffs;
- Operate electrical E-stop;
- Check motor/pump drive couplings for correct alignment;
- Check coupling insert (rubber spider gear) for signs of wear;
- Visually inspect breakaway device and apply a light oil to sealing joint;
- Visually inspect fire extinguishers.
Quarterly:
- Clean y-strainer and meter screen;
- Lubricate pump bearings;
- Lubricate motor bearings.
Semiannually:
- Tighten bolts and nuts;
- Inspect motor starter switch contact points;
- Pump performance test, bypass setting.
Annually:
- Recertify fire extinguishers;
- Review emergency action plan (or as needed for new employees);
- Operator refresher training (or as needed for new employees).
As needed:
- Clean area, paint tank and piping, refresh decals;
- Replace liquid filter cartridge (if applicable) according to manufacturer recommendations.
Consult the site location AHJ (Authority Having Jurisdiction) for meter and scale proving your dispenser.
Finally, it’s worth mentioning again to always pressurize the dispenser pump slowly with propane vapor, prior to applying liquid flow.
